Ahh, ok. I was under the impression "ride height" was the distance from frame to ground achieved by adjusting preload, "sag" was the amount of free play from the resting bike to the top of the shock stroke, and "length of suspension" was just the length of the shock eye to eye. But as I said I'm coming from quads so different nomenclature I guess!
You mentioned in a previous post stock springs are set for 150lb rider, I'm about 160 with gear. Should be fine for the average daily rider. What is the ideal sag people should be shooting for with a properly matched spring?
General rule for static sag is about 30% of your total wheel travel (TWT).
How do you figure this out (rear wheel):
1) Have a buddy hold the bike upright (not on the side stand) and pull up on the bike until there is no weight on the rear suspension.
2) Measure between the axle and a fixed point (FP) on the bike directly above the axle. Write this number down as it is your Fully Extended Suspension number (FE). Lets say in an example bike FE = 350 mm.
3) Fully geared up and ready to ride, the rider gets on the bike, in riding position.
4) First buddy holds the bike upright BY THE HANDLEBARS
5) Second buddy PUSHES DOWN the rear of the bike down a couple of inches and lets the bike SLOWLY come back up.
6) Second buddy measures between axle and FP and write this down as L1. Continuing our example above L1 = 300mm
7) Sometimes it is good to do 5-6 a couple of times so you get a consistent L1 number.
8) Second buddy PULLS UP the rear of the bike a couple of inches and lets the bike SLOWLY come back down.
9) Second buddy measures between axle and FP and write this down as L2. Continuing our example above L2 = 320mm
10) Sometimes it is good to do 8-9 a couple of times so you get a consistent L2 number.
11) Calculate current sag = FE - [(L1 + L2)/2] Continuing the example: 350mm - [(300mm + 320mm)/2] = 350mm - 310mm = 40mm. Current sag is 40mm
But what is the ideal sag for this bike?
Look at the owners manual and find out the total rear wheel travel (TWT). If the total rear wheel travel (TWT) is 110mm then you multiply 110mm X 30% = 33mm is your target static sag number.
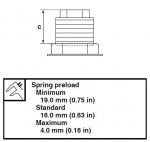
Now, go back to the rear shock. Since you currently have 40mm sag that is too much sag so you need to add A LITTLE preload to the rear spring and then repeat steps 3-11 to determine your newly adjusted sag.
If you added too much preload, your newly adjusted sag will be less than 33 mm.
If you did not add enough preload, your newly adjusted sag is somewhere between 40mm and 33mm.
You may need to add or remove a little preload and repeat steps 3-11 until you get to 33 mm static sag.
I don't have the owner's manual for the XSR in front of me so the 110mm total travel and the target 33 mm static sag is just an example and not necessarily correct for the XSR.
As you can see, the sag is function of the rider and the bike. So what works for a 140 lb rider will not be the same as for a 180 lb rider or 230 lb rider (like me). Further, if you do not have the correct springs installed to handle the weight of the rider, you can never get to the correct sag numbers.
You should also follow the same basic process for the front but it is important that the bike is held upright by the REAR of the bike while measuring the front sag.