

Copied and expanded upon from the build thread...
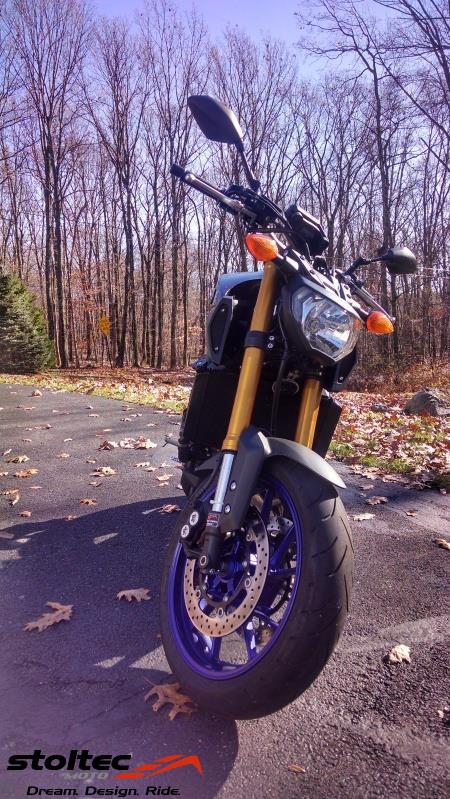
In between playing around on the suspension, I set about fixing something that has irked me from day 1: that blasted horn. To my eyes, the placement is terrible and the gaudy silver ring doesn't do the front of the bike any favors. I was originally planning to design/fabricate/sell a simple kit to relocate this horn, and then I figured out an easier solution...
Original horn location:
![Image]()
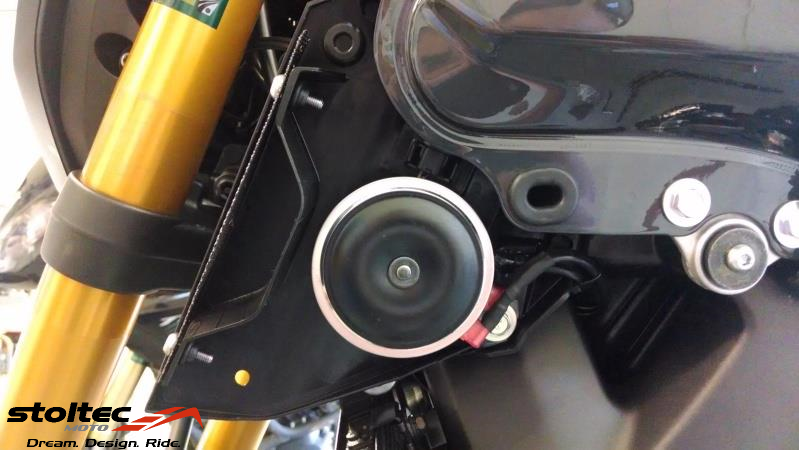
So where does it go? Well, remove the LH scoop cover and you'll find a convenient void where something belongs:
![Image]()
The factory horn bracket required NO modifications. Remove the horn and flat plate/bracket held to lower triple tree with one bolt (10 mm head). Remove bolt in scoop (also 10 mm head), install horn, tighten bolt.
![Image]()
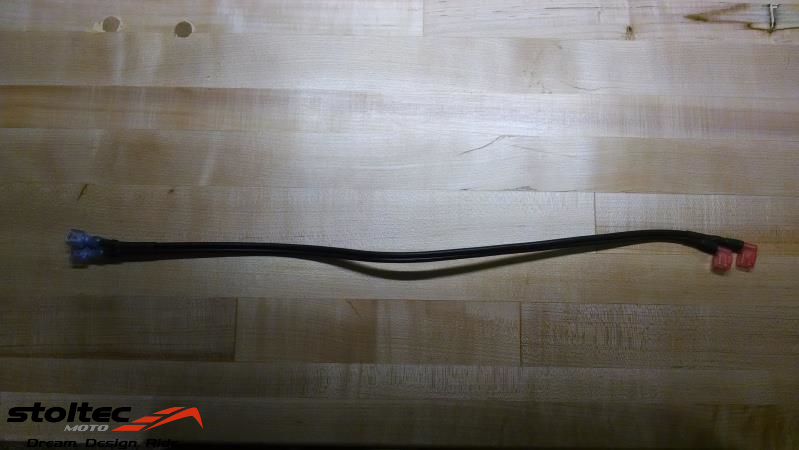
Make yourself a ~19" jumper cable to extend the horn connections. Red ends are female, blue are male:
![Image]()
Route from scoop, through frame, back out of access alongside throttle cables. Run through both wire loops (you'll see them when you're looking) and connect behind headlight:
![Image]()
Remove original bracket which secured the horn and it's flat plate bracket to the lower triple. Add 2 10mm washers (SS so as not to rust) under the headlight bracket to make up the original thickness, reinstall bolt and voila!
![Image]()
So if you don't have the wire and connectors laying around, you'll be in ~$5 to your local hardware store and 20 minutes of your time. Really cleans up the front of the bike. Sometimes what you can't see is more important than what you can...
![Image]()
In between playing around on the suspension, I set about fixing something that has irked me from day 1: that blasted horn. To my eyes, the placement is terrible and the gaudy silver ring doesn't do the front of the bike any favors. I was originally planning to design/fabricate/sell a simple kit to relocate this horn, and then I figured out an easier solution...
Original horn location:
So where does it go? Well, remove the LH scoop cover and you'll find a convenient void where something belongs:

The factory horn bracket required NO modifications. Remove the horn and flat plate/bracket held to lower triple tree with one bolt (10 mm head). Remove bolt in scoop (also 10 mm head), install horn, tighten bolt.
Make yourself a ~19" jumper cable to extend the horn connections. Red ends are female, blue are male:
Route from scoop, through frame, back out of access alongside throttle cables. Run through both wire loops (you'll see them when you're looking) and connect behind headlight:

Remove original bracket which secured the horn and it's flat plate bracket to the lower triple. Add 2 10mm washers (SS so as not to rust) under the headlight bracket to make up the original thickness, reinstall bolt and voila!

So if you don't have the wire and connectors laying around, you'll be in ~$5 to your local hardware store and 20 minutes of your time. Really cleans up the front of the bike. Sometimes what you can't see is more important than what you can...

")


